Feeds:
Posts
Comments

Posts Tagged ‘etsy shop’

I’ve never been able to decide if my favourite colour is green or blue. If I decide on blue, I always regret sidelining the hues of fresh leaves, deep forests and oceans, jade, emerald and Connemara marble. Similarly, if I plump for green, that excludes all the shades of sky and sea, sapphire and lapis lazuli. What a good job there are endless variants of turquoise, which mixes them both! Among my stitching friends we all seem to have our go to colours for stitching and left to my own devices I will almost invariably gravitate to the green-turquoise-blue spectrum.

I really enjoy making what I call my ‘mandala’ brooches and pendants and before Easter we had a couple of sessions making some at In The Stitch Zone. I’d sold all the ones I’d already made so it was the perfect excuse to make another with a base of the most delicious piece of teal-turquoise silk dupion. I had to get both the front and back out of the silk, and it literally was just a scrap, so this is the biggest I could make it. I didn’t want to obscure the fabric too much, so the simple design was led by the five-fold symmetry of the brass cog I stitched in the middle. I added bead caps, French knots, seed beads, and unusual twisted links from a broken chain to make a dainty star and then echoed the points with a beaded picot edging featuring gorgeous iridescent peacock turquoise delicas.

I finished it off with a large odd chain link for a bail and a reclaimed vintage gold tone chain and you can find it here in my Etsy shop.

I enjoyed making this mandala pendant so much, I literally went straight into a second, this time working with an even smaller scrap of peacock-blue velvet. I bought a load of random metal detecting finds several years ago with the intention of making them into upcycled jewellery and I was running my hands through the bowl in which they live when two rings caught my eye – one old and hand forged and almost the shape of the ‘eye’ of a peacock feather and the other smaller and machine made. One offset inside another with an odd coin-shaped mother of pearl bead…

Once I’d stitched them down with a variegated thread that combined greens and turquoises with some of the patina of the metal (treated with micro-crystalline wax so it stays stable) I didn’t want to add much more: the border of roughly faceted marcasite beads was enough of a finishing touch.

Looking through the bowl of metal oddments again, I found what I think is probably a metal button with a similar patina which works perfectly as a bail.

This one hangs from a new thong with sterling silver mounts and can be found here in my Etsy shop.

I’m toying with the idea of creating kits for people to create their own Mandala brooches or pendants. As well as the usual bits: instructions, fabric, pelmet vilene, hoop, threads, needles, beads etc, I’d also include one of my ‘Magpie Packs’ to give people a selection of random odd, broken and unusual bits they can stitch into patterns. What do you think?

Read Full Post »

I have been stitching, but it’s under wraps for the moment, so I thought I would share what has finally happened to some of the job lot of odd chess pieces I bought at the beginning of the year.

I learned a number of important lessons in a short space of time.

I’ve learned that box wood is incredibly hard, cheap modern metal eyelets are soft and that if you drill the hole properly in the first place instead of drilling the start of it and hoping that the eyelet screw thread will just do the rest for you, it saves hours of work trying to drill out the broken eyelet stumps and then eventually giving up in a temper and and throwing the whole ruined piece (the unusual white pawn with the disc-like layers in the centre of the picture above) in the bin along with three broken eyelets and a broken drill bit.

The partial modern set you can see towards the back of the first photo was more user friendly. It’s made from a much less dense wood and I polished and drilled several of the pawns to turn them into earrings. I made some simple ones with just the pawns:

And then some longer ones with added beads.

This pair, with vintage Japanese lustreware beads, is available here in my Etsy Shop.

And I finished off my morning’s work by turning a vintage black knight (with a softwood head which made adding the hanging loop easy) and a boxwood base into a necklace by adding some sections of chain and a couple of vintage beads.

I’ve recently started stocking my work at a lovely local community café where people often go to play chess, so it was the perfect place to put the chess piece jewellery. I hope they find some takers.

Read Full Post »

Just to update, I’ve finished off the two pieces of embroidered upcycled jewellery I finished stitching at the market last week and listed them in my Etsy shop. The wreath brooch has gone from this:

To this:

And is available here in my Etsy shop. The lavender locket insert was at this stage last week:

And now looks like this:

You can find it here. I’m not sure why, but my head is crammed full of upcycled jewellery ideas at the moment. The latest creative splurge was instigated by this large brass brooch which was missing most of the catch. I thought the individual elements were pretty – especially the leaves – but I felt it wasn’t particularly desirable as a whole.

So I took the saw to it. The third flower was very chunky and gummed up with solder so I scrapped that, leaving me with the following elements. The three leaves and the wrapped stem section has been put aside while I figure out what I’m going to do with it, but I already had ideas for the pair of leaves and the two roses.

The roses were easy. I shortened the stems, drilled them, added vintage mother of pearl beads to the middles and turned them into a neat little pair of earrings.

I also trimmed and drilled the stems on either side of the pair of leaves…

…before doing a bit of upcycling of my own original work. Back in 2013 I took a silversmithing course and among the many things I made was a load of impressed and hammered brass discs, which I domed and fixed over the holes in some silk cocoons to turn into pendants.

They were not a success as the brass element was so heavy, they didn’t sit right, so have been languishing in a drawer. It occurred to me that I could deconstruct one, cut the brass dome into a calyx…

…turn the silk cocoon upside down, add beaded stamens and turn it into a flower to hang below the leaves. So I did.

I’m enjoying the creativity so much – just a pity that life and teaching has to get in the way!

Read Full Post »

I’m trying to get stuck into processing some of the broken jewellery job lots which seem to have built up over the last few years. Partly so I can use the box I’ve been storing them in for my workshop folders but mostly so I can see what I actually have and start creating.

Processing is basically cleaning and sorting. As most jewellery is worn next to the skin, it can be…well, greasy. Sorry if you happen to be eating at this point. So a good scrub in warm soapy water with a firm bristled toothbrush is a must. I also put some of the all metal pieces into my barreller, again with warm soapy water and let it work its magic.

Then I sort out what I have. Some pieces are wearable, so I decide if they are worth listing on eBay or Etsy, taking to a car boot sale or popping into the charity bag. This leaves me with the proper broken bits. Occasionally it literally is rubbish, so if I can’t recycle it (usually only a tiny amount) then it goes in the bin. Some pieces need further breaking down, like stripping the beads off necklace fragments or separating useful components from an earring drop and then I’m left with the keepers which I sort into various boxes, depending on what they are, to use later, when inspiration strikes!

Often, inspiration strikes as I’m cleaning and this is what happened with the tiger cowrie shell butterfly barrette which some of you might have seen on Instagram recently. The lot I was sorting contained some ovals and circles cut from tiger cowrie shells. Two of the ovals had just one hole drilled in them so I made them into a pair of drop earrings, but the ovals with four holes looked like they would be a bit more of a challenge to turn into earrings. But added to two of the smaller circles…

The large black and cream bead was also in the same lot and was exactly the right proportion to become the body. A selection of orange beads from the orange bead department (which is why I sort my jewellery bits carefully) and some gold tone wire added the finishing touches and I stitched it down onto two layers of good quality green heathered felt.

Next, the cowrie shell pieces, which I stitched down in a geometric pattern with my favourite metallic Madeira thread.

Cutting the felt away around the edge once I’d done the stitching was a bit nerve-wracking, especially around the tail, where I needed something to be present underneath the beaded body, but not enough to be obvious.

The cowrie pieces had been cut from the top of the dome of the shell, so even though there were two layers of felt behind, there was still a bit of a void under the top wings. I filled this with some padding made from felt scraps before covering it with a butterfly-shaped piece of pelmet vilene for extra firmness and another piece of the green felt.

I connected my felt and vilene sandwich with beaded blanket stitch with dark copper colour seed beads to match the markings on the shell pieces and orange mercerised cotton to echo the touches of orange on the body. The beads also help to keep the blanket stitch even!

A first – a video on my blog! I hope this shows how lovely and sturdy it turned out with all the layers of felt and the beads have given the edging a nice solid feel too.

At this point I was still unsure whether to finish it as a brooch or a hair barrette and my poll on Instagram turned out exactly 50:50, which was no help. So I decided to go with what I think will be more saleable – a barrette – and stitched a new barrette clip onto the back.

You will notice, if you look at the ‘tail’ section that I’ve not beaded it. When I was joining everything I felt that the beads would be too big for the tight corners and I was struggling with very narrow pieces of felt which I didn’t want to shred, so I left it as plain blanket stitch. But the more I looked at it, the more I hated it. it was untidy, uneven and spoiled a result which I’m extremely proud of. So at the weekend I carefully undid the blanket stitch, fastened off the ends of the thread so I didn’t lose the rest of the beads and beaded the tail. It was a lot easier – mostly I think because the rest of the stitching was already done so the felt and vilene pieces were firmly held in place.

It’s the little details. And I’m finally happy for it to flutter off into my Etsy shop here

…along with my harlequin clasp.

Read Full Post »

Back in May 2019 I ran my Ribbon Roses workshop (details in the Workshops tab at the top of the header) for what was then the Selby Embroiderers’ Guild. In the afternoon those who had moved on through the morning’s activities stitched a Ribbon Rose Brooch from some little kits I’d made up.

I came across the remaining kits last year when I was creating my Upcycled Kilt Pin Brooch kits but as they were designed to be a follow on activity for someone who had already stitched the closed fly stitch leaves and the woven spiders’ web roses, the instructions were quite sparse and not suitable for a similar makeover.

However, I felt that they would still make a good subject for a kit when I got round to being able to sit down and create suitable photographs and instructions. And that was this week! I chose the kit in the above picture to photograph while I made it up and enjoyed an easy morning’s stitching to get to this:

It was a lot of fun to stitch and although having to continually stop and take photographs of every stage kept breaking my flow, it’s an easy project which stitches up quickly and can be completed in an hour or two, depending on your level of confidence and familiarity with the various stitches used. It was also useful to confirm that there was enough of everything in the kit, apart from the ribbon as I had to find another piece to work the French knot buds.

Unfortunately the process of writing up the instructions, creating the designs and images is taking an awful lot longer than the brooch did to stitch in the first place!

The Harvest Wreath is finished and I’m really happy with the balance of the leaves.

And last but not least, this week’s update on January’s Move It On Project. Thanks to a committee meeting and an actual face to face social read of our next pantomime script this week, I’ve now completed the kantha spirals on five out of the six tiles. I’m happy that I continued with the spiral backgrounds as I really like the way the pattern of the stitches works at the point four tiles meet and I couldn’t see that when I’d only stitched three.

It’s not the most exciting of things to stitch at this stage but being well over half way is a big boost. I’m unlikely to get it finished in the 36 hours left of this month, but that’s not a problem and not the aim of the Project. I’ve moved it on, solved the thread issue, decided on the pattern for the background and will definitely finish it at some point, probably turning it into a book cover. So all in all, month one of my 2022 Move It On Project has been a great success!

Read Full Post »

Last week, I was at a bit of a standstill with the print to stitch medieval tiles piece which I’ve chosen as January’s Move It On Project having completely run out of thread that was anywhere near close. However, thanks to Debbie who has an affinity for these lovely warm autumnal shades and a huge collection of appropriately coloured threads, I now have a bobbin of the right coloured stranded cotton and no excuse not to move things on! I finished off the tile I was stitching in the darker thread and as it’s the outer ring of stitching, I don’t think it looks out of place.

I was also toying with the idea of giving up on the spiral kantha and going back to seeding for the back ground of the last three tiles but having trialled it, it looked odd, so I’ve continued with the kantha and now completed four out of the six tiles.

The beauty of this piece is more in the way it feels with the wool felt backing and the dense stitching than the way it looks, so I’ve been working on my Hungarian Braided Chain Stitch harvest wreath, which is a bit prettier! Last time I shared it back in October, I was most of the way through adding the Raised Cup Stitch poppy flowers.

I’ve since finished them and given them all French knot middles.

So next I’m adding some leaves, using a free form of fly stitch which I’m stitching back into to fatten up parts of the leaf. It’s a slow job, working in a single strand of stranded cotton, but I think the wreath needs it for balance.

Lastly I’ve added a new Flotsam pendant to my Etsy Shop.

It’s a lightweight and easy to wear combination of Suffolk driftwood, Seaham sea glass and a lovely chunk of beach pottery and comes with a new faux leather thong with a sterling silver clasp.

Available here in my Etsy shop.

Read Full Post »

It all started with this odd earring. It’s not a very good image because it’s already partly disassembled (I got all excited and forgot to take a photo before I attacked it with the pliers!), but you can hopefully see that it’s made up of three pairs of brass leaf shaped sections that made me think of flower calyxes.

That was enough to spark off an idea for a pendant and a pair of earrings using silk cocoons for the main part of the flower with a brass calyx on top of each one.

Pendant first. I made a set of beaded stamens by threading some random sequences of blue and gold bugle and seed beads onto Nymo and then knotting the ends onto the loop of a headpin and setting it all with a blob of superglue. This is my third cocoon. I discovered the hard way that the silk on its own wasn’t robust enough to cope with having a headpin put through it and I had to use a layer of glue to strengthen the fibres.

But the result was worth it. The little ‘hat’ section from the earring makes an effective calyx for a fantasy flower. It’s available here in my Etsy shop.

For various reasons, I didn’t get round to the earrings until today. I managed to find an almost identical pair of silk cocoons and they really are this red! you also get a better idea of how the brass ‘calyxes’ look from this photo.

Beaded stamens again, this time in greens and golds.

The silk cocoons are really light so although the drops are quite large at 5cm long and 2cm in diameter, they are a lovely weight and not too heavy to wear. I’m hoping to get them listed in my Etsy shop shortly when I can get some more photos of the details.

It seems ages since I had a good jewellery making spell and after finishing these earrings today I was feeling really inspired. It’s a shame most of the rest of this week is going to be taken up with three days supply teaching but as online sales have dropped through the floor over the last few months, beggars really can’t be choosers.

Read Full Post »

Happy Tenth Birthday to this blog! Please help yourself to a piece of virtual cake. :o)

I wrote my first post on May 2nd 2011 which also happened to be Bank Holiday Monday.

In 2011 blogging was massive in the creative community. It seemed that everyone from full time textile artists to complete beginners were sharing their art and creative processes and many of the blogs I followed were like fabulous magazines, full of gorgeous images and insights into all types of embroidery and textile art that were new and endlessly fascinating to me. People connected, made friendships, shared ideas and advice and I found I could join a whole world of people who loved stitch as much as I did.

However, blogs have waned massively in popularity since 2011. Probably half to three quarters of the bloggers I was following in 2011 have stopped blogging for one reason or another and I have to put my hand on my heart and say I don’t read blogs as regularly as I used to – like many of us I’m more likely to scroll through the same people’s Instagram feeds. But although we get the instant gratification of a pretty or interesting picture on Instagram, I still do value the time and space to explore creative practise that you get in a blog.

The rise of social media is understandable. It takes a moment to upload a photo from our phones onto Instagram, type a few words and hashtags and press send. The image is out there and it gets instant engagement. You can click a like on it in less than a second before you move onto the next piece of eye candy, or spend a few more putting a heart-eyes emoji or a brief comment. It has its place. Some quick feedback about a problem; affirmation that you have made something pretty or reassurance that other people are in the same position. Speed of response can be very useful.

On the other hand, blogs take time and effort. You need to compose your thoughts, create readable content and suitable images to go with it. Not everybody has the time or natural affinity with words to do that which makes the bloggers who are still plugging away out there very special and their posts a valuable resource.

Social media is a snack – like a bag of crisps. A blog is a meal. Words and ideas to digest. You have to take your time and work through the blogger’s thoughts and accompanying images and to continue the metaphor, like a meal, a good blog post leaves you feeling satisfied. Or it can be so delicious it leaves you hungry for more. More images, more explanation, more of an insight into a project. A very common comment to both give and receive is something along the lines of, “I can’t wait to see more of this project!”

So thank you to all the fellow bloggers who still follow and comment on my tiny corner of the internet. Thank you for letting me know I’m not just talking to myself and thank you for carrying on with your blogs and continuing to interest, engage and inspire me with your creativity.

Lastly, the watch case pendant is finished.

Rachel asked how I was going to attach a chain to the winder and luckily my plan worked! One of my biggest jump rings was just big enough to go round the stem of the winder and still have enough room to attach the silver plated chain to either side. It’s a bit askew here because I’d turned it round to photograph the back and it wasn’t sitting properly, but it give an idea of the way it’s constructed.

Available here in my Etsy shop.

Read Full Post »

After having stitched the next section of ribbon for the glazing bars of the Temperate House at Kew down with stab stitches, it was clear that the original blanket stitches had to come out. Much better.

This has made it less bulky, so I decided to take Rachel’s (VirtuoSew Adventures) advice and run the bars right across the background.

Next I need some white thread for the thinner vertical bars, but there is white and white, as I found out a few years ago when I stitched a whitework piece and discovered that the threads I thought were identical under artificial light certainly were not in daylight! So I’m leaving the thread matching for a day with good natural light.

I’ve just added this sweet little upcycled sea glass brooch to my Etsy shop. It was one of those satisfying moments when after having trawled through a large pile of sea glass finding pieces that were almost but not quite right, I picked up this gorgeous green oval and it clicked into the vintage brass brooch setting like it had been made for it.

As if I didn’t have enough projects on the go, this week I’ve started a little or nué design of an acorn. I painted it onto some indigo dyed calico, left over from the Persian Chandelier piece with my Inktense sticks, which I love.

Then I started couching down the gold threads, using Pearsall’s ‘Gossamer’ thread. It’s so thin, it’s literally like stitching with spider’s web, so perfect for the job. It was a bit challenging to make the gold thread turn as tightly as possible at the ends , but so far, so good.

As I approached the edge of the acorn, I realised I hadn’t made things easy for myself. I was going to hit the acorn at an angle, rather than straight and this was going to potentially make it more difficult to get the shading right.

However, considering the amount of time it had already taken me to get this far with the gold, I have decided to keep on and see what happens. If nothing else, it will be an important lesson and remind me to do a bit more research before I blithely jump into a brand new technique!

Read Full Post »

As promised from last week, here is the second china pot fragment, this time filled with ribbon embroidery irises, which have worked out rather nicely. The flowers are lazy daisy stitches with a stitch threaded through the bottom of the chain to give the falling petals, the leaves are done with ribbon stitch and the stems are two rows of split stitch.

I ended up finishing it late at night and the only photos I have of the finished piece have huge shadows round the sides of the pot which look like stains! Anyway, it was done in time for Mothers’ Day and went down well.

I’ve been working away on a couple of upcycled pieces of jewellery. The first was a fairly easy conversion from a broken 1907 silver and hardstone shamrock brooch to a pendant. The c-shaped catch was in good condition and substantial enough that I could twist it round to create a hanging loop. There was very little left of the pin hinge so I was able to carefully saw the remains off and neaten up the scar.

With the addition of a jump ring and a silver chain it’s good for at least another hundred or so years.

Available here in my Etsy shop.

The second make was a bit more of a puzzle. A chunk of abstract fused silver with two holes and a short length of tube on the back.

I wondered if the tube was supposed to be a bale, but it was very narrow and you would have struggled to get anything but the finest chain through it. And a very fine chain would have been out of proportion to the chunky pendant. So I decided to use the top hole as the hanging point and removed the tube. That left me with what to do with the second hole. I couldn’t hang anything from it as it was too far up, so I went through my odd stud earrings to see if there was anything to inspire me. I found a couple of round studs with semi precious cabochons in silver settings which were attractive before a little frog stud tumbled out of the bag. I’m not sure why I tried him in place, but he somehow turned the abstract chunk of silver into a sort of stylised lily pad.

He just works perfectly!

Mr Frog is available here in my Etsy shop.

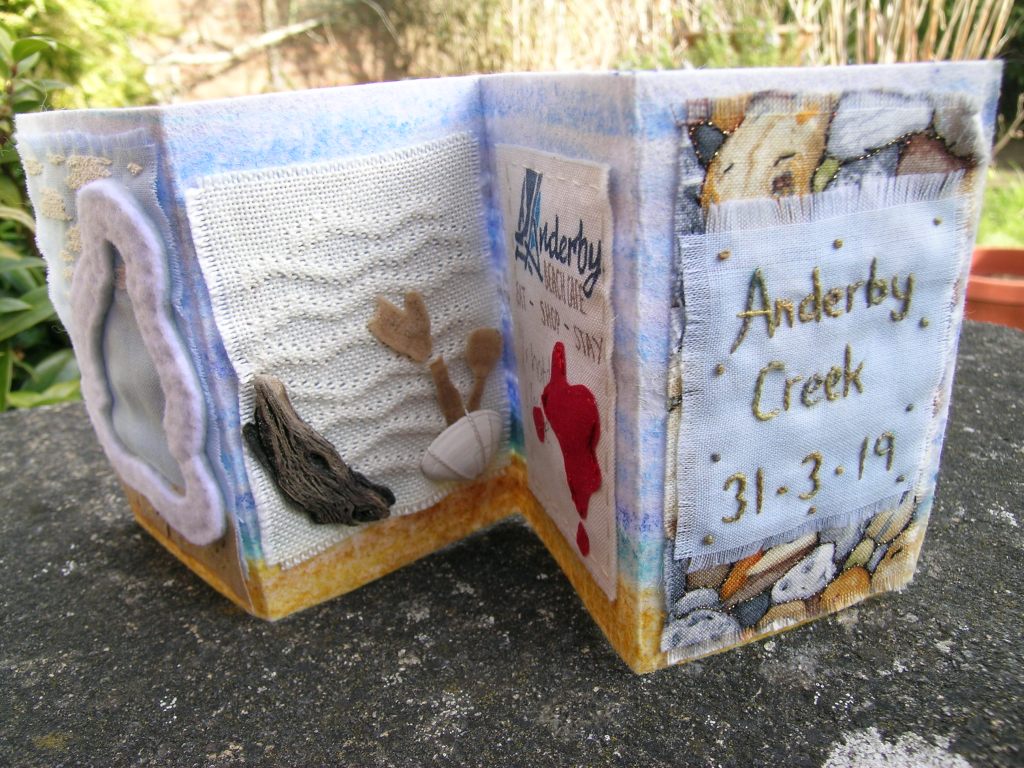
As our second Mothers’ Day under lockdown in the UK rolled around, it reminded me of the memory journal of my beach walk on Mothers’ Day 2019 which I finished on Mothers’ Day 2020.

And that in turn reminded me that I have two pieces still to do for my Kew memory journal from June 2019. The recent needlelace sampler was a half hearted attempt at testing out some ideas for a piece based on the magnificent Chihuly Persian Chandelier which hung in the middle of the Temperate House.

But I’ve decided that I need to stop faffing and get on with it, so this morning I assembled some delicious Mulberry Silks, my tiny antique crochet hooks and a piece of lovely indigo dyed calico.

Time to stop overthinking and see what happens…

Read Full Post »

Older Posts »

Karen Turner Stitching Life

Pieces of a life with thread

Stitching Diaries

Level 3 Stitched Textiles Embroidery with Distant Stitch

summerholiday111

stitching, creative textiles, inspiration

hertstitch

for embroiderers and textile artists in hertfordshire and beyond

karensstitchography

Embroidery & other craft

re:retro

collecting retro

View From Our Hill

Textile, Mixed Media, Yarn, Books and Beads

Things I find in the garbage

I'm a professional scavenger making a living selling curbside garbage. This blog details my finds and sales. It also acts as an archive for things beautiful and historic that would otherwise have been destroyed.

Stitched up with Thread

Slowly threading things together through stitch

Lincs In Stitches

Creative ramblings in the Lincolnshire Wolds

Kiln Fired Art Blog

Over 60's blogger enjoying slow living, art, crafts, textiles, cooking, walking and nature

Hillview Embroidery

Teaching and Learning One Stitch at a Time

Dreaming In Stitches

a mingled yarn

sunshine and celandines

These are a few of my favourite things. 🥰

LucyAnn &Luna craft

crafting,dachshunds including other bits & bobs

Carlseapatch's Weblog

A log of progress (I hope)and fun in textile arts

seafieldview

Life on a Cornish cliff

late start studio

You don’t have to catch up, you just have to start. Tammy Garcia

Shibori Girl

....practicing the fine art of shibori

Pomegranate Studio

- because making is good for us

Fall from Grace Crafts

A blog on my craft journey highs and lows...

opusanglicanum

one Englishwoman's work

Playful Bookbinding and Paper Works

Chasing the Paper Rabbit

Chrissie Freeth - Tapestry Weaver

Blog of artist and tapestry weaver Chrissie Freeth

debbidipity

into textiles & beyond

KDD & Co

Award-winning Scottish publishing and design